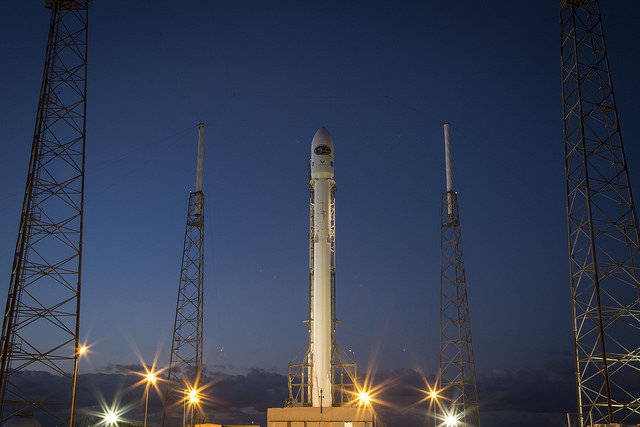
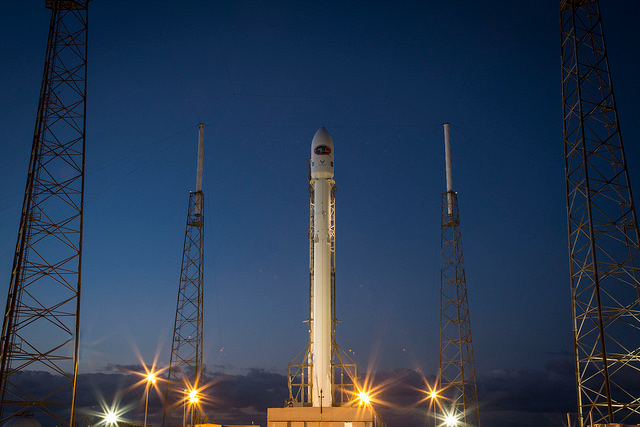
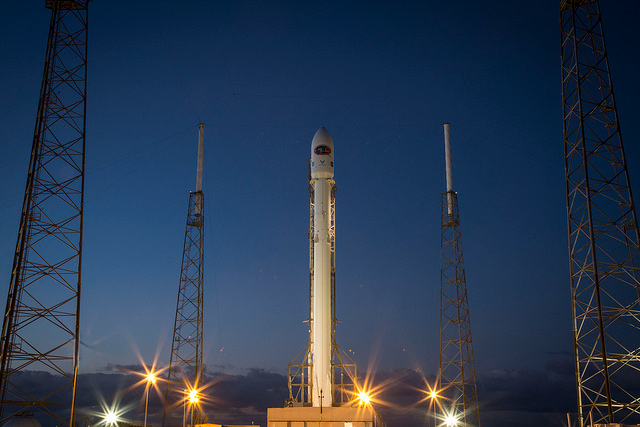
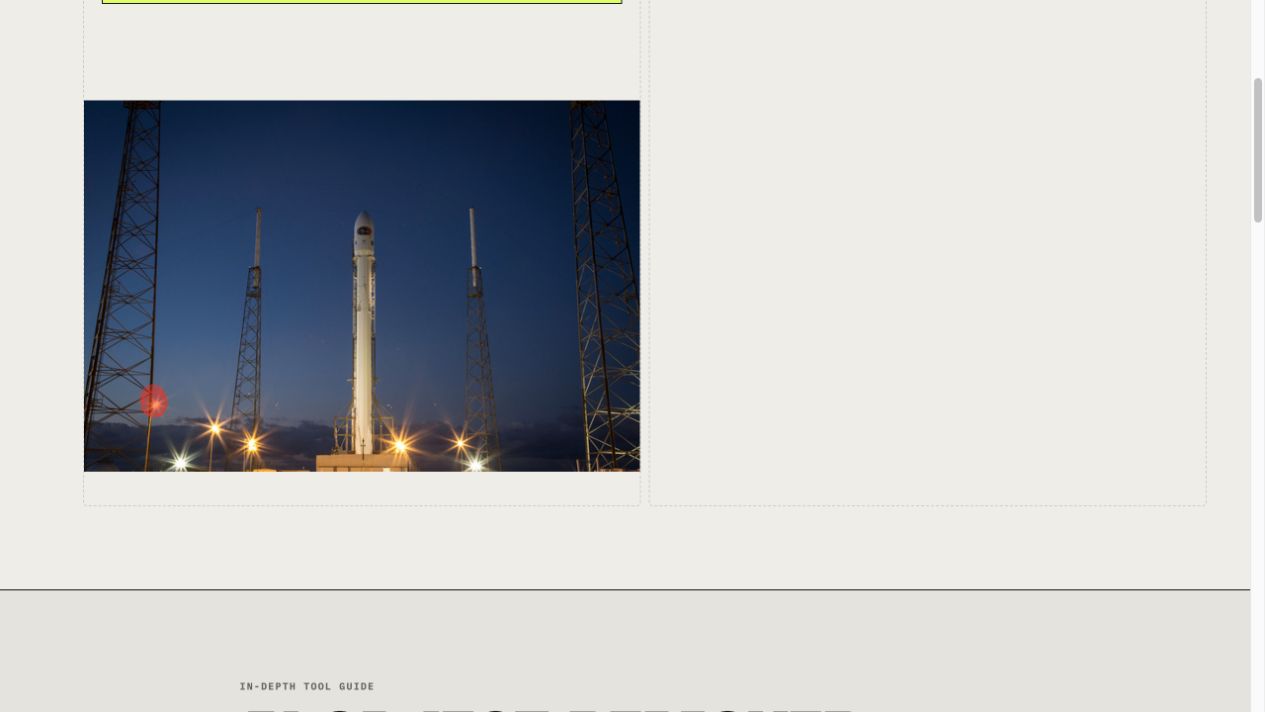
This new run repeats a narrow, achievable task: remove the small bright flare on the far-left tower, around source pixel (81,350). It does not remove the larger lamps along the bottom or the tower itself. We used the unchanged SpaceX photograph, a brush radius of 15 and one short stroke over the flare, followed by one processing pass.
Why this result meets the small-repair brief
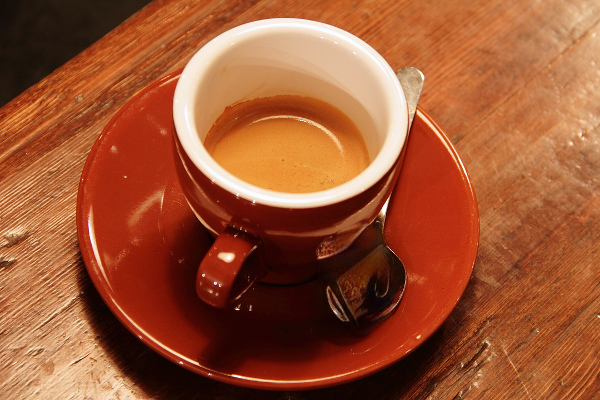
The star-shaped light disappears, while the rocket, larger lights and main tower silhouette remain. The replacement is darker and softer around the thin tower member. At ordinary display size it removes the distraction; at full size the local texture is still synthetic. This is acceptable for a disclosed decorative edit, not evidence of what was hidden behind the glare. The older incomplete spoon mask below remains a failure example.
Follow the complete operation
- Download the source and open Object Remover. Select the photograph in the upload area.
- Set Brush radius to 15. Cover the whole small flare on the left tower with one short stroke. Use the actual painted-selection screenshot to identify the target; screen coordinates change with window size.
- Choose Remove painted area and wait for the processing dialog to close. Avoid painting the nearby lower lamps.
- Compare the replacement with the original, following the tower line through the patch. Use Undo if the line is unacceptable, then paint a revised selection and run again.
- Download the PNG. Check the saved image at its native 640 × 427 size before accepting it.
The record retains brush size, drag endpoints and canvas geometry. It is an approximate manual recipe, not an exported pixel mask: pointer sampling and resampling can change the exact result. The original JPEG carries an Adobe RGB profile; the PNG export has no embedded profile, so raw channel differences alone are not a repair-quality score.
Source: SpaceX Falcon 9/DSCOVR photograph, public domain, distributed by scikit-image. This is an illustrative alteration, not an unedited documentary photograph.
How this October result was recorded
Observed in the Codex in-app browser on macOS arm64 using the local release preview. The displayed PNG data was saved byte-for-byte without image re-encoding. The automation's download-event wait timed out, so this artifact alone is not evidence that a normal browser download completed. See the run record and file dimensions and SHA-256 hashes for the exact scope.
September experiments: earlier outputs, failures and measurements
OBJECT REMOVAL LAB · SEPTEMBER 7, 2026
A spoon that stayed, and a small flare that disappeared
These two new runs test different editing decisions. The coffee photograph deliberately uses an incomplete spoon mask; the rocket photograph uses a short stroke over one small glare. Both completed on the production Object Remover and exported PNGs. Completion is separate from acceptance: the first still fails its brief, while the second needs close inspection where the glare crossed a thin structure.
The runs used the in-app browser on macOS arm64 during approximately 13:38–13:46 China Standard Time. That is an observation window, not an inference-time benchmark. The recovered MI-GAN worker/model were in use, before the newer progress-status patch. Model and worker fingerprints are in the run record.
Coffee: painting the bowl did not remove the spoon
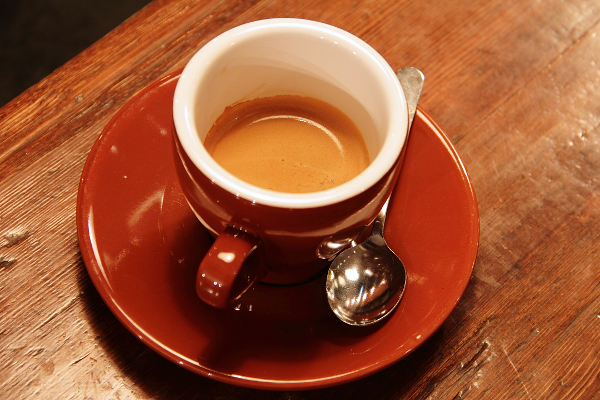
The intended delivery was a spoon-free coffee image. With brush radius 30, two strokes covered the bowl region but omitted much of the handle and related reflections. The exported bowl becomes darker and mottled; its metal rim and spoon-shaped silhouette remain readable. The handle above and alongside the cup still identifies the object. Bright reflected shapes on the cup also survive.
This is a useful failure because the operation returned an image without fulfilling the task. A smaller bright highlight is not equivalent to a missing spoon. For another attempt, I would trace the entire visible spoon, inspect its reflection separately, and check that the replacement follows the saucer's curvature and glossy texture. That is a proposed next edit, not a result established by these two strokes.
Rocket: inspect the structure after removing its light
The target was the small star-shaped flare on the outer left tower, around pixel (81,350), not the larger lamps along the bottom. A radius-15 stroke ran from (81,347) to (82,354). An earlier misplaced mask was undone; only the final calibrated operation's saved export is shown.
The glare disappears, while the tower's main line, the central rocket and the other lamps remain recognizable. At the repaired point, the replacement has lower contrast. Follow the thin vertical member through that patch and compare the nearby lattice: removing a dazzling spot can expose an unconvincing continuation. This is usable as a small decorative repair at display size; the source cannot establish what the obscured tower detail actually looked like.
The coordinates are a record, not a saved mask
For coffee, the recorded screen drags were (422,440)→(428,492) and (409,453)→(424,483). Its displayed canvas began at (85,204), measured 562.5×375 CSS pixels and had a 1125×750 backing store. Mapping to the 600×400 source gives approximately (359.47,251.73)→(365.87,307.20) and (345.60,265.60)→(361.60,297.60).
The full record also preserves the rocket canvas geometry. We did not export either pixel mask or every intermediate pointer sample. Drag endpoints and brush settings support an approximate manual rerun; they do not guarantee identical antialiasing, mask resampling or output bytes.
A color profile can masquerade as a large edit
The rocket JPEG embeds Adobe RGB (1998), while its exported PNG has no ICC profile. Comparing their raw channel values flags 106,601 pixels at a difference threshold of 16. Converting the source to sRGB in memory first reduces that count to 517, concentrated around the repaired light. The published image files were never transformed for this measurement.
Profile-aware comparison of the same-size files| Case | Pixels differing by ≥16 in any RGB channel | Difference bounds [x0,y0,x1,y1) |
|---|
| Coffee · 600×400 | 5,579 | 317, 222, 396, 336 |
|---|
| Rocket · 640×427 | 517 | 67, 333, 96, 369 |
|---|
These counts locate changes; they are neither mask area nor reconstruction accuracy. Browser/Pillow decoding and color conversion can also differ. Download the four images and measurement script into one folder, install Pillow and NumPy, then run python3 measure-artifacts.py. It writes JSON measurements and hashes, never images.
Full measurements and color assumptions · SHA-256 manifest. To repeat the editing, upload the original file, apply the recorded brush operation, run once and save before retouching. Judge the whole object and adjacent structure before accepting the export.
Sources: Rachel Michetti's coffee photograph, courtesy of Pikolo Espresso Bar, CC0; SpaceX's Falcon 9/DSCOVR photograph, public domain, distributed by scikit-image. Source provenance and registry hashes. New material consists of the recorded edits, unchanged exports, measurements and review.